
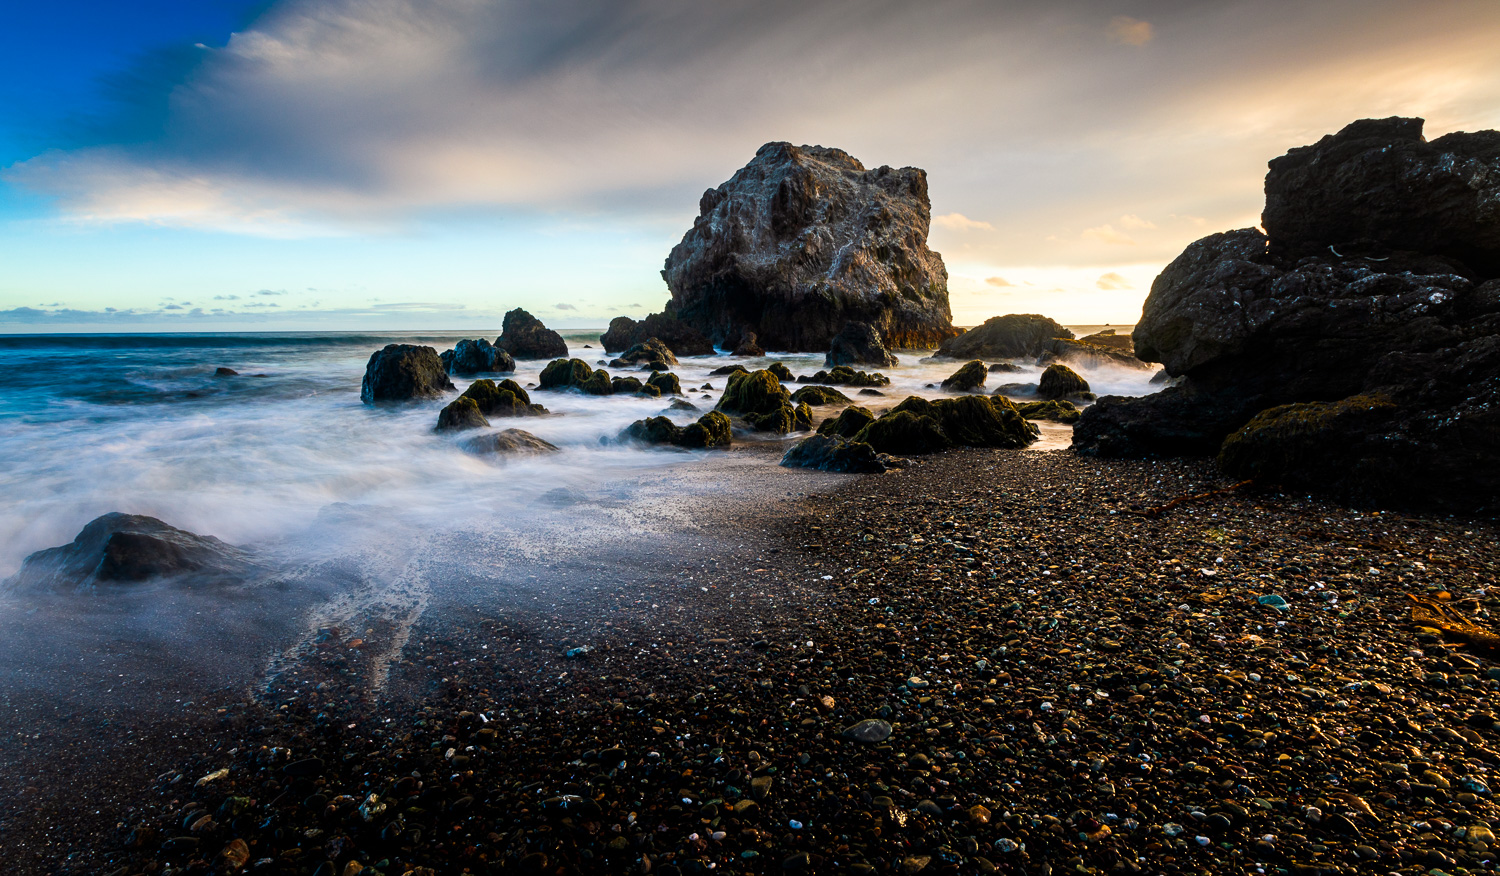
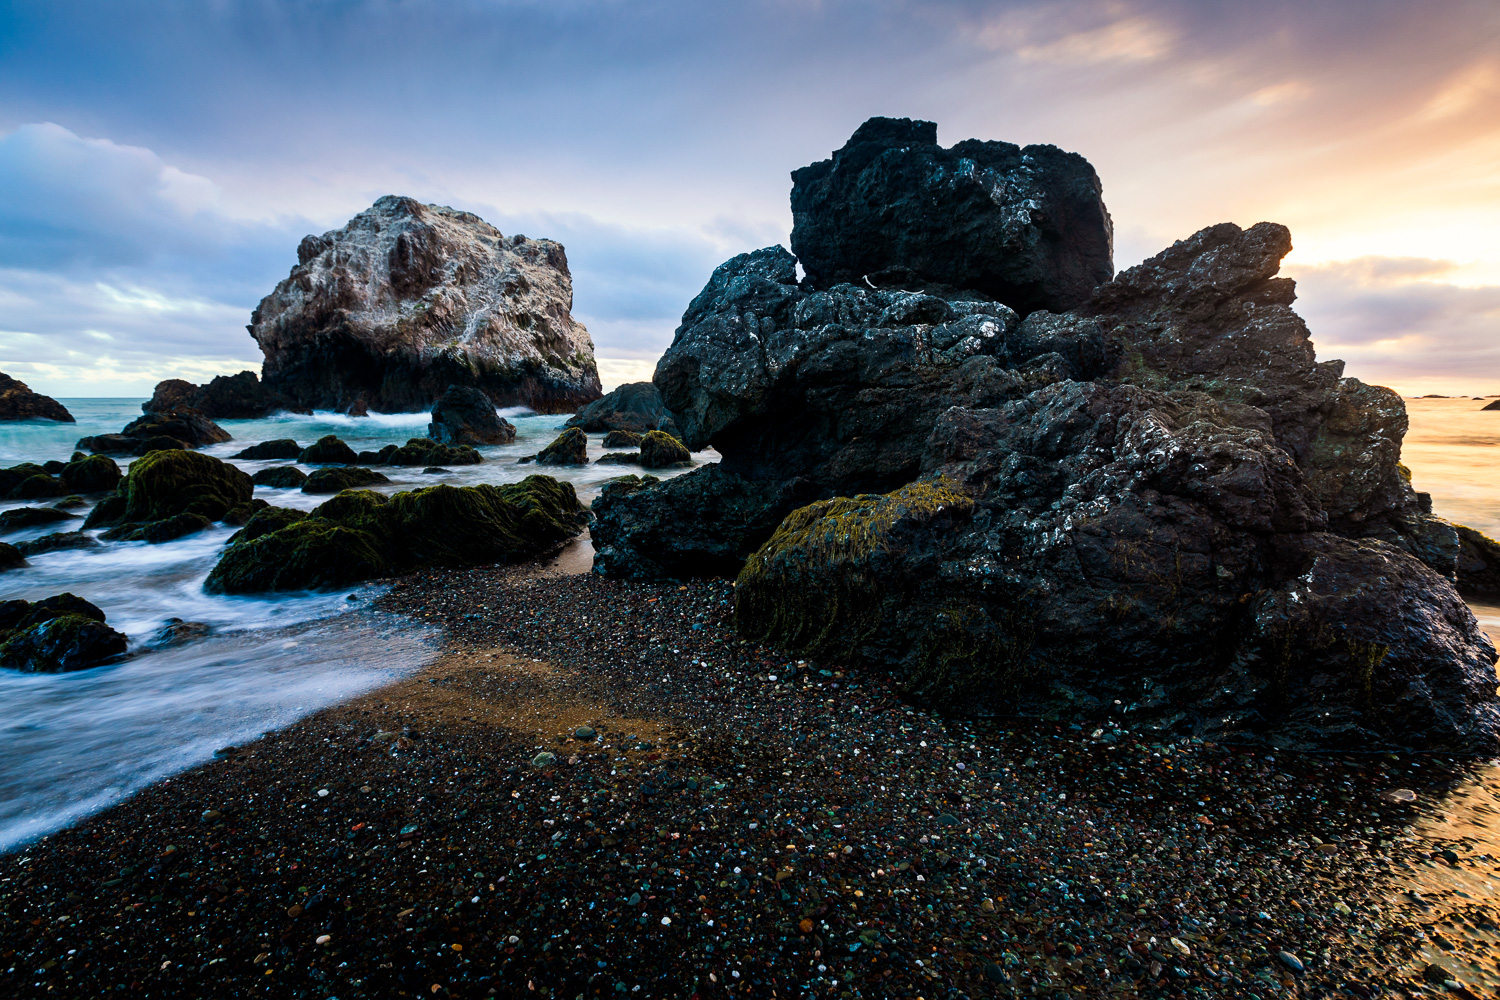
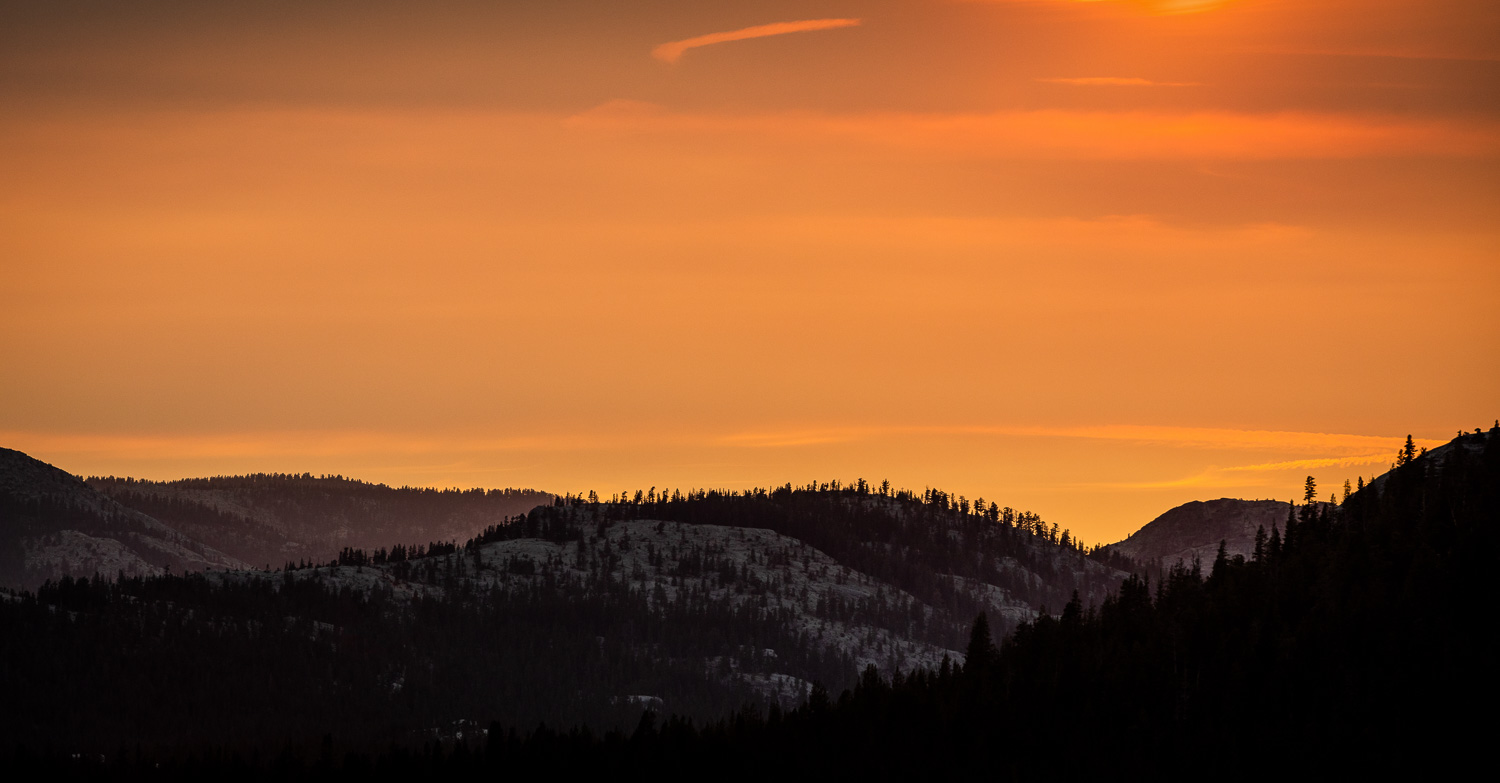
San Simeon, California
Last Sunday I drove up to San Simeon, California for sunset and stopped at a pullout along the PCH a little south of Hearst Castle. I was excited to get a colorful sunset since the last four or five times I’d gone out to photograph had been incredibly overcast.
Last Sunday I drove up to San Simeon, California for sunset and stopped at a pullout along the PCH a little south of Hearst Castle. I was excited to get a colorful sunset since the last four or five times I’d gone out to photograph had been incredibly overcast.
Anyway, here’s a few of my favorite images from the evening. They were all made using a Canon 5D Mark IV and a 16-35mm lens. I used Adobe Lightroom and either Nik Color Efex Pro or OnOne Photo Raw to edit them.


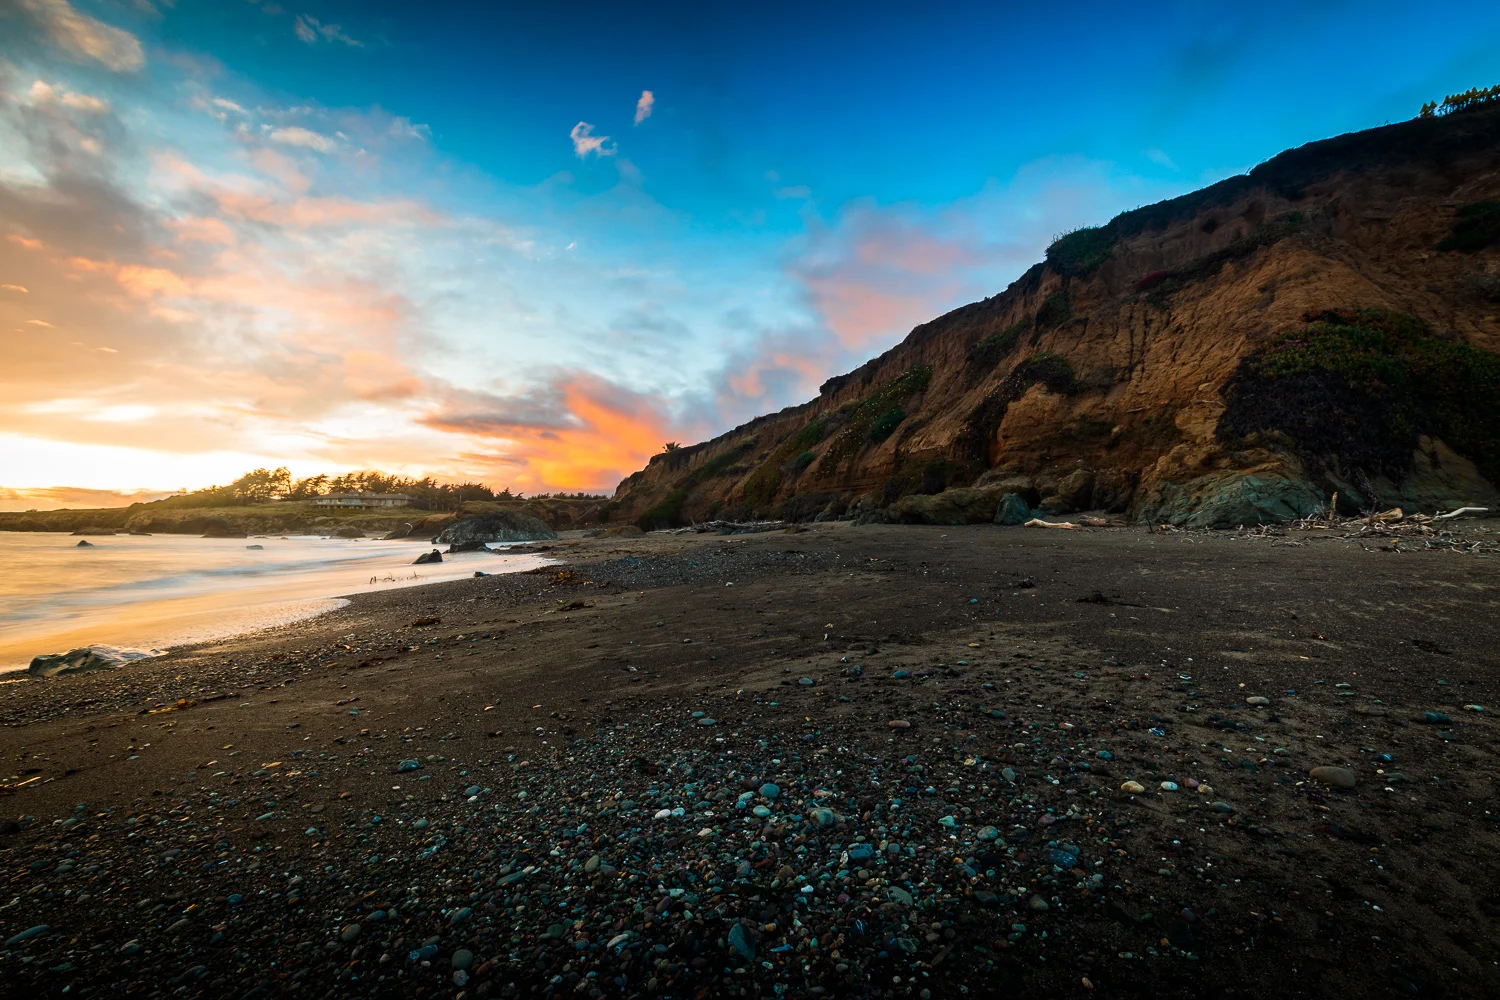

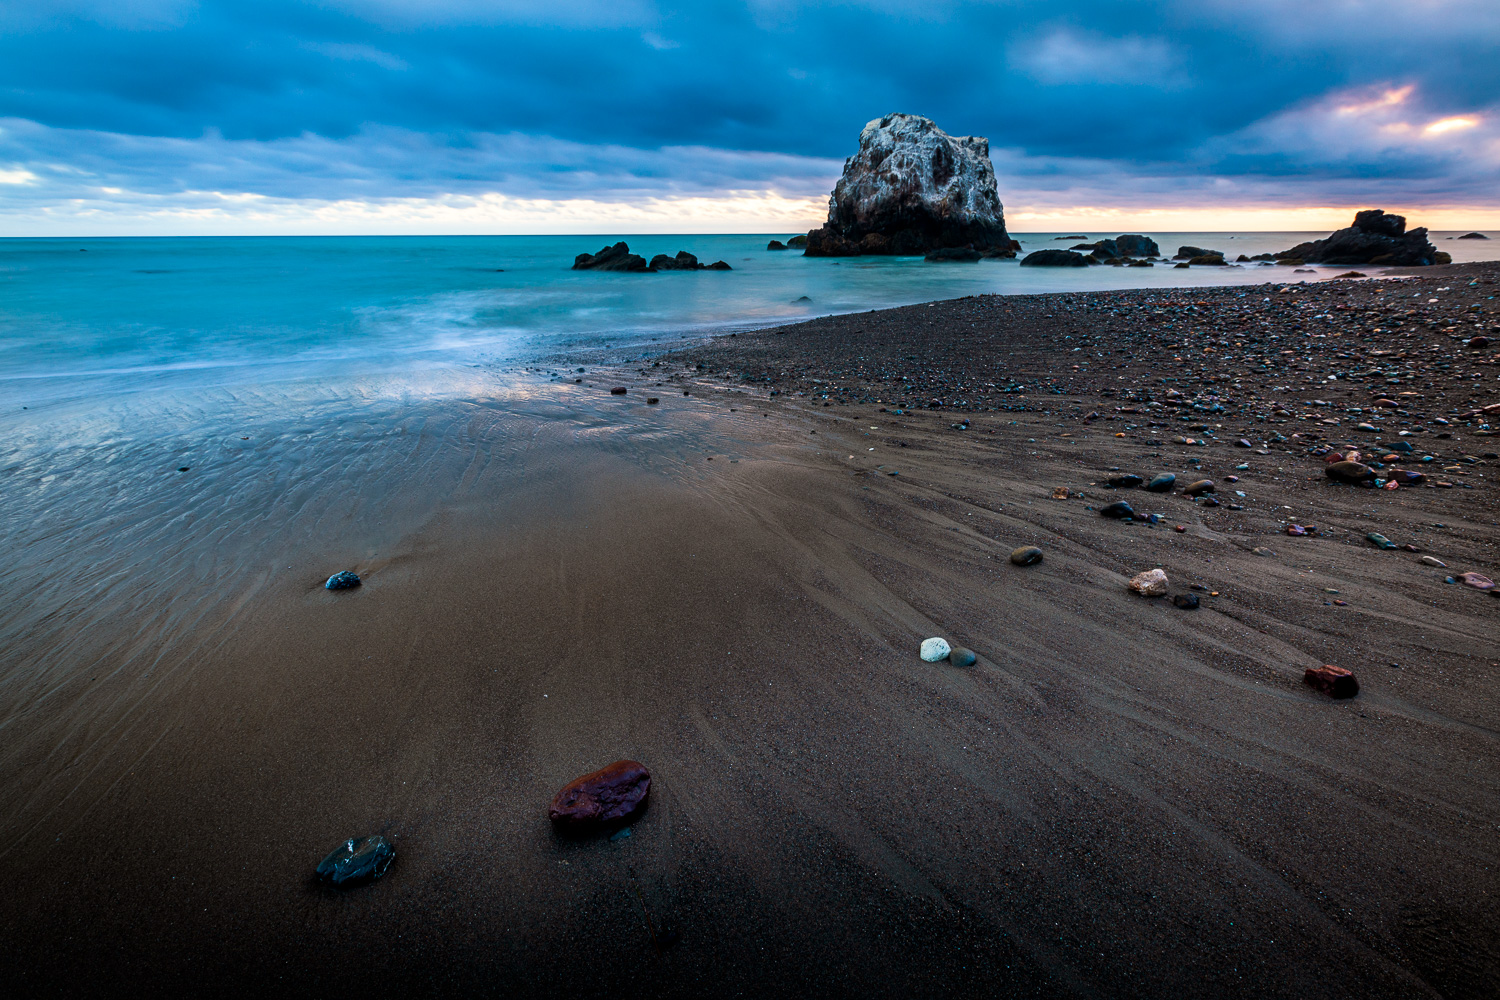


Montaña de Oro State Park, Los Osos, California
I finally got a chance to photograph my first sunset in the San Luis Obispo area. This was one of the most spectacular sunset I’ve ever seen. Minutes before, it was a relatively cloudy evening with mediocre color. Quickly, the sky lit up with beautiful blues, pinks, and oranges. It’s a sunset I won’t forget.
I finally got a chance to photograph my first sunset in the San Luis Obispo area. This was one of the most spectacular sunset I’ve ever seen. Minutes before, it was a relatively cloudy evening with mediocre color. Quickly, the sky lit up with beautiful blues, pinks, and oranges. It’s a sunset I won’t forget.
The images are captured with a Canon 5D Mark IV along with a 16-35mm lens. The photographs were edited using a combination of Adobe Lightroom, Nik Color Efex Pro, and OnOne Photo Raw 2017.


Understanding ISO
The final piece of the photographic triangle is ISO. ISO refers to how sensitive the camera’s sensor is to entering light. Creative, interesting photographs are a result of the careful combination of aperture, shutter speed, and ISO.
Understanding ISO
The final piece of the photographic triangle is ISO. ISO refers to how sensitive the camera’s sensor is to entering light. Creative, interesting photographs are a result of the careful combination of aperture, shutter speed, and ISO.
Generally, the ISO settings will range from ISO 100 to ISO 6400. As digital cameras have continued to advance, higher level models may offer ISOs as low as ISO 50 and upwards of ISO 12800. A lower ISO means that the camera’s sensor is less sensitive to light, while higher ISOs results in a sensor that is more sensitive to the light.
Increasing the ISO causes a faster shutter speed, while decreasing the ISO will lengthen the shutter speed. For example, if you photographed a flower at f/4.0, ISO 100, at 1/250 sec. and then increased the ISO to ISO 200 without altering any other settings, the shutter speed would decrease to 1/500 sec.
How to Use ISO
For the most part, try to use the lowest ISO whenever possible. Increasing the ISO results in more noise in the image which can be distracting and unflattering. Unless you’re attempting to create a specific look, you will generally want to keep the ISO as low as possible. With that said, don’t be afraid to crank up the ISO if you are in a low light situation where you need the faster shutter speed. You would much rather have noisy photos than blurry photos. Likewise, underexposing a photo to get a faster shutter speed as opposed to properly exposing the photo and increasing the ISO actually makes the noise in the image worse, since noise is most abundant in a photo’s shadow areas.

In this particular image, I was forced to increase the ISO to a relatively high ISO 3200. This enabled me to capture the player during his warmup at a shutter speed of 1/250 sec (aperture f/2.8). Here, the noise actually adds a bit of mood to the photo and isn’t all that noticeable unless you fixate on it.
Low ISOs and Long Exposure Photography
Low ISOs can be used to your advantage when capturing a long exposure photo. Since lower ISOs will result in a longer shutter speed, they are a great tool for long exposure photography. They will help increase the shutter speed allowing the desired level of blur, while also ensuring very little noise in the picture. Noise is more prominent at longer shutter speeds so this helps to further combat that.

In this photograph, an aperture of f/16 along with the minimum ISO 100 led to a relatively long shutter speed of 10.0 seconds which resulted in an adequate level of blur in the middle ground of the picture and the passing clouds.
Closing Thoughts
As a general rule, use the lowest possible ISO, but remember that aperture and shutter speed should be considered first as they offer a wider range of creativity. Finally, don’t get too caught up in minimizing noise because the vast majority of the people that view your image won’t notice it.

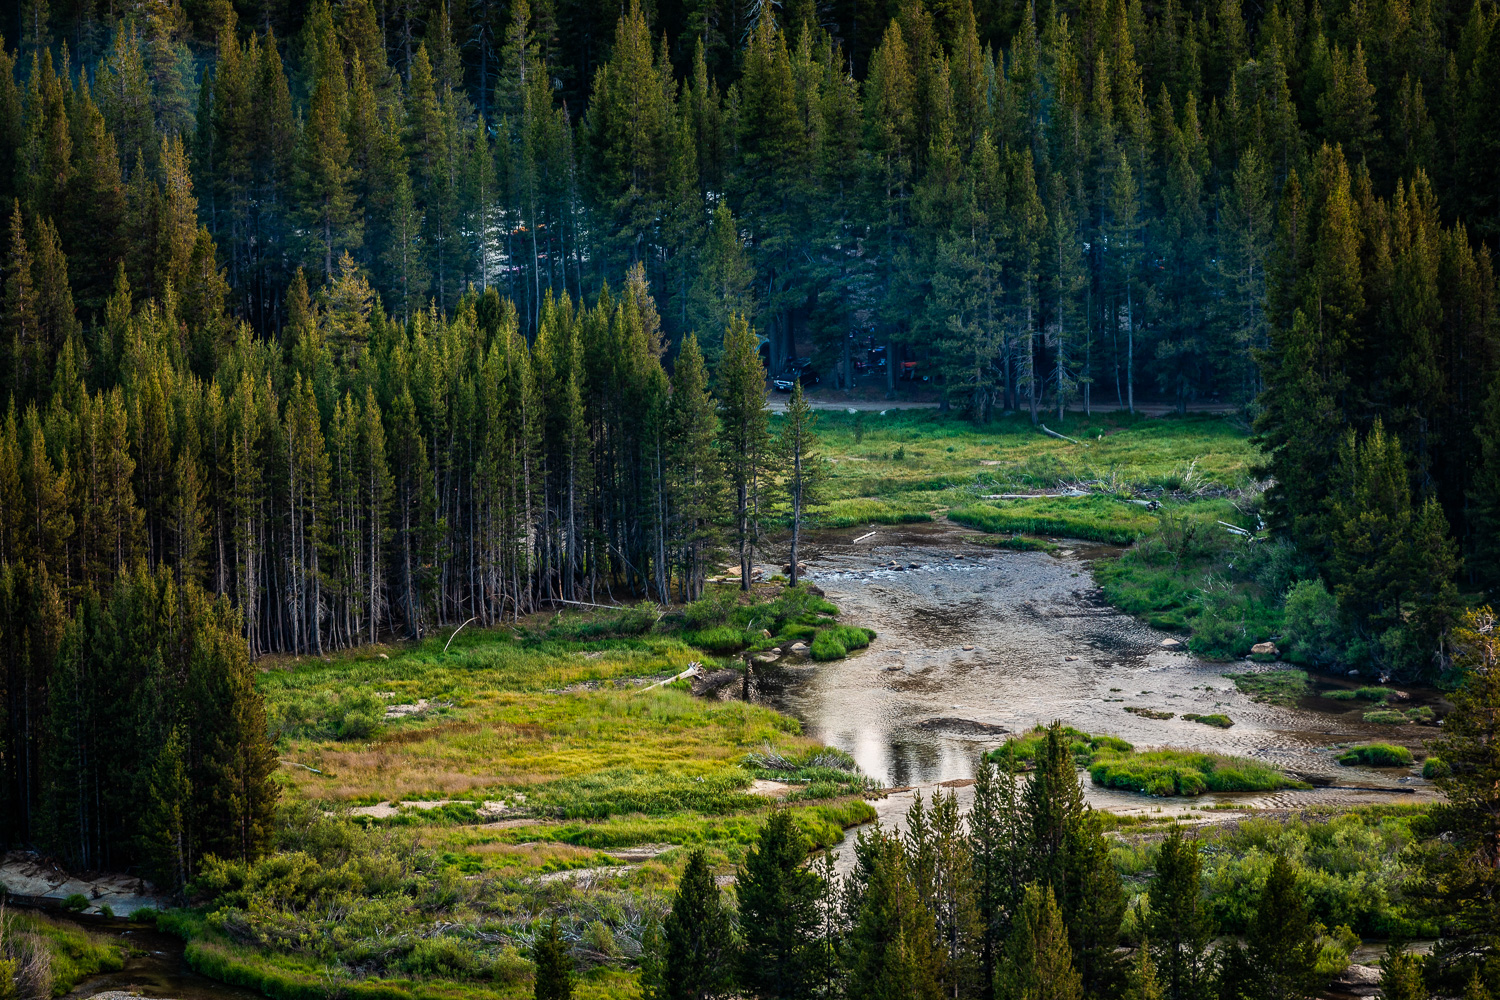
Yosemite National Park
A couple weeks ago, I went on a road trip to Yosemite National Park with two friends. We camped for three nights, did several hikes, watched sunrises, and captured some beautiful photographs. Below are some of my personal favorites from the trip.
A couple weeks ago, I went on a road trip to Yosemite National Park with two friends. We camped for three nights, completed several hikes, watched sunrises, and captured some beautiful photographs. Below are some of my personal favorites from the trip.


Understanding Shutter Speed
Understanding shutter speed is an important concept to comprehend in order to create creative and interesting photographs. Specific shutter speeds are often effective in certain circumstances to create a desired effect. Almost all present day cameras, including point-and-shoot cameras, offer several different shutter speed choices. The function of the shutter speed is to admit light onto the camera’s sensor for a specified duration of time in order to create a properly exposed image.
Shutter speed affects the perception of movement in an image. A sense of motion can be created by having a moving subject in the composition or by physically moving the camera. A combination of both methods can be used as well. Generally speaking, fast shutter speeds are used to freeze action, while slow shutter speeds blur the action. Although there are instances where shutter speed isn’t the biggest concern, choose the shutter speed with the intent of producing a creative image. The shutter speed you use will depend on the subject and overall composition.
Fast Shutter Speeds
Fast shutter speeds freeze motion, making them ideal for sports, wildlife, and action photography. Fast shutter speeds reduce the amount of time the light has to hit the sensor. For this reason, you’ll likely need to use a larger aperture and/or increase the ISO. In order to freeze the action in the picture, you will generally need a shutter of at least 1/500 sec. Sometimes an even faster shutter speed is needed, such as 1/1000 sec. Utilize the properties of aperture, shutter speed, and ISO in order to produce the most creative and unique image you can.
This picture was captured in Navarre Beach, Florida during sunrise. The wide open aperture and back-lit scene produced a very fast shutter speed of 1/2000 sec. This shutter speed allowed me to freeze the birds in flight and capture a sharp picture.
Long Shutter Speeds
Long shutter speeds increase the amount of time the light has to hit the sensor and help to create a sense of movement within a photo. These shutter speeds are useful for photographing waterfalls, streams, waves, cityscapes, or any scenario where creating a sense of motion might be interesting. In order to achieve long shutter speeds of 1/30 sec. or longer a small aperture and a low ISO are typically required. Additionally, the longer the shutter speed is, the less texture the final image will contain. Experiment with a variety of shutter speeds to see the various texture differences in action. As I mentioned earlier, you can create movement in the picture by deliberately moving the camera as well.
This picture was created in Fort Walton Beach, Florida a while after sunset. This resulted in the vibrant blues and greens that are present in the image. The long shutter speed of 30.0 seconds removed almost all the texture of the water and even slightly blurred the clouds. The shutter speed used in this particular instance helps alter the sense of reality and produces a textureless, almost pastel-like photograph.
Contrarily, this sunrise of the Ventura Pier in Ventura, California features quite a bit of texture in the crashing wave and ocean water. A relatively long shutter speed of 3.2 seconds was used to blur the wave as it crashed along the beach, while also maintaining a bit of it’s texture. This creates a distinct sense of movement and helps draw the viewer’s eye throughout the photo. Shutter speed can even be used to enhance composition!
Mid-Range Shutter Speeds
Mid-range shutter speeds generally range between 1/60 sec. to 1/500 sec. These are often shutter speeds that don’t necessarily produce a sense of motion, but also can struggle to freeze action. For this reason, these shutter speeds are generally used when freezing fast-paced action or affecting motion isn’t a serious concern.
In the photo above I used mid-range shutter speed since I could easily freeze the subject without a fast shutter speed. On the other hand, a slow shutter speed would have made it difficult to get a sharp image. Altering motion wasn’t much of a concern in this picture.

Understanding Aperture
Aperture is one of the vital components used to construct creative and compelling photographs. Often times, specific apertures can be used for certain situations or subjects. Aperture is defined as the space in the lens that allows light to enter the camera and hit the sensor. In order to alter the aperture you typically turn a dial or press a button on the camera body. In turn, the hole letting in the light increases or decreases in size. Consequently, more or less light will hit the camera’s sensor.
The smallest aperture number, usually 1.4, 2.8, 4, or 5.6, depending on the lens, lets in the most light. When you use the smallest numbered aperture (f-stop) you are shooting “wide open.” As you increase the aperture number, the size of the hole is decreasing. This is known as “stopping the lens down.”
The largest aperture numbers are usually 16, 22, or 32. When using the largest numbered aperture the lens is at its smallest opening, letting in the least amount of light.
Aperture is responsible for the depth of field in the image. Depth of field is the area of sharpness within a photograph. For example, if you are photographing a flower with mountains in the background, you may notice that when you focus on the flower the mountains go out of focus and when you focus on the mountains, the flower goes out of focus.
The camera itself does not control whether an image is completely sharp. In theory, a lens is only able to focus on one subject and depending on the other objects in your image, they will be less sharp. Generally the farther the object is away from the focus point, the more out of focus that object will be. Aperture is used to manipulate the camera and lens to achieve a desired level of sharpness. Optical law states that the smaller opening of any given lens (large f-stop numbers), the greater the area of sharpness in the photo. Using larger apertures such as f-stop numbers of 2.8, 4, or 5.6, means that only the light hitting the focused object will appear sharp. The rest of the light on the rest of the composition will splatter on the sensor and appear blurry and out of focus.
On the other hand, if you take the same object and photograph it with a small aperture, such as f/22, the amount of light hitting the sensor is considerably decreased. This results in a reduced splatter and an overall sharper scene. This is especially useful when shooting landscapes.
With this in mind, it’s a common misconception that one should only shoot with small apertures in order to achieve a completely sharp image. However, aperture is an incredible creative tool that should be explored. Experiment with a variety of apertures until you find something unique and creative. The subject and the amount of sharpness you desire will determine the aperture you use. The aperture will differ based on the situation.
Large Apertures
Generally you want to use larger apertures when you want to isolate your subject from the background. For example, if you were to photograph a flower against the rest of the plant; you would probably want to isolate the flower in order to make it stand out from the the busy background. Isolating your subject often results in a simple, effective composition.
In this picture of my dog, Khola, I wanted to clearly isolate her nose from the rest of her body, but still preserve the viewer's ability to decipher her eye. Since macro photography results in a limited depth of field, I used a relatively large aperture of f/5.6. As a result, the texture of the dog's nose is exceptionally sharp and contrasts well with her blurred eye.
Small Apertures
Small apertures are typically used to produce a sharp, defined background or to maximize the depth of field in the picture. For instance, generally speaking, when photographing a landscape you will likely want the entire composition to be sharp. Rendering the entire scene sharp preserves the way the human eye views the landscape as well as conveying the sense of beauty and vastness in the scene. In order to achieve complete sharpness in the image, use an aperture of f/16 or smaller. Maximizing depth of field conveys the “story” of the composition.
This image was captured in Navarre, Florida just after sunset. The photograph features quite a bit of depth as the dock leads the viewer all the way towards the horizon line. In order to ensure that the entire dock as well as the buildings along the horizon were in sharp focus, I used an aperture of f/22. This is a stereotypical instance where a small aperture is best suited.
Mid-Range Apertures
Lastly, use mid-range apertures such as f/8 - f/11 when your entire scene is at a similar focused distance. When the scene lacks depth almost all apertures will produce a sharp image. Most lenses are the sharpest between f/8 and f/11, so using one of these apertures will result in the sharpest possible image. Common examples of subjects that lack depth include walls, footprints on the beach, the peak of a mountain, etc. When photographing these types of subjects there isn’t a need to isolate the subject and a small aperture isn’t needed to maximize depth of field since there is so little depth in the image.
This photograph was created along the Pacific Coast Highway at Thornhill Broome Campground in Southern California. Since the photo lacks significant depth with a distinct foreground, middle ground, and background, I used an aperture of f/8.0 to produce the sharpest possible image.